If you use subscriptions in your Community, your paywall is a key part of the experience. It’s the page members see when they try to access parts of your Community that need a subscription. Here's how to manage and adjust it.
What is the Paywall We Hear You Ask?
If you use a hard paywall (or premium model), your whole Community sits behind the paywall as members need a subscription to access your amazing content. If you use a soft paywall (or freemium model) then only certain parts of your app are behind the paywall, and some parts won't require a subscription. Find out more about Soft vs Hard paywall.
The paywall itself is your chance to showcase the benefits a member gets from subscribing, and to highlight the different payment frequencies and prices you offer.
So What can I Change on the Paywall?
When you first setup your mobile app subscriptions, you give us the information you want to be shown on your paywall and the prices you want to charge, and we do the initial setup for you. Once you are up and running, you should regularly review the paywall content to ensure it still accurately reflects what you are offering with your subscription and that it’s doing a good job of converting members to subscribers.
There are a number of areas of your paywall content that you can edit, so head over to the Console, click on Convert and select Monetisation from the left hand side and let's dive in!
The top section of the paywall is where you want people to quickly understand what your Community is about, and what they get when they subscribe:
-
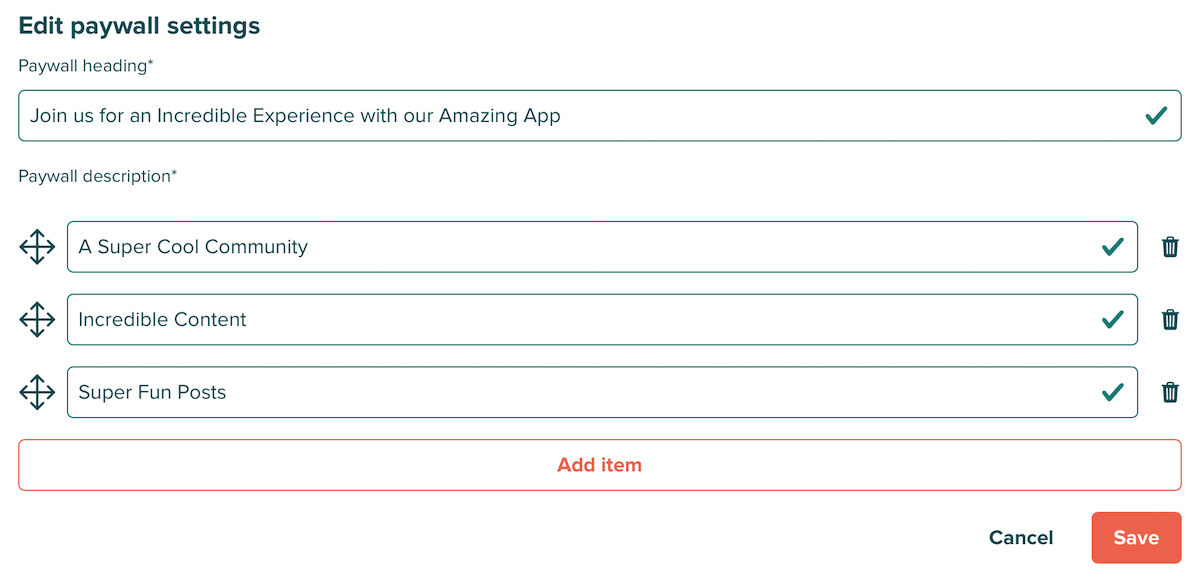
Paywall Heading
This is shown in large text at the top of the paywall and it's usually best to keep this short and sweet. Use it to explain the key benefits and uniqueness of your subscription. -
Paywall Description
This is displayed as bullet points below the heading, and allows you to explain other benefits of subscribing. You can edit, add, reorder or remove individual points at any time

Don't forget to press Save when you're done!
Now that you have done that, the next step is to edit your Plan Icon and Subscribe Button Text.
-
Plan Icon
This is the icon used to show members that content in your Community needs a subscription to access it. A padlock is the usual go to option here but if you brand your subscription in a particular way you could change the icon to suit. You have a range of options in the drop down menu to choose from. This icon is then shown on premium Posts, Pages, Pages contents and livestreams
-
Subscribe Button Text
This is the text shown on the Buy button on your paywall. By default this is set to Subscribe but you can change it. We recommend using a verb or command as your call to action e.g. Buy, Purchase or Subscribe - and keeping the button text short to make it easy to scan.

Multi-Plan Subscriptions:
If you have multiple subscription plans in your Community, you’ll see options to change the plan name, icon and subscribe button text for each of your plans. You’ll also see an extra field you can edit - Plan description.

This is only shown when you have multiple plans, and is the content on the paywall plan cards that helps you distinguish between the features and benefits available with each of your plans.
We recommend this is setup as bullet points for clarity and ease of reading on the paywall. The editing field accepts basic HTML formatting and our customer success team will input this for you when they first setup your multi-plan subscriptions.
As always, don't forget to hit Save!
Making Changes Live:
Once you've updated any fields you want to change, pressing the Save button at the bottom of the page will overwrite any previous settings and make them live straight away.
It's important to note though that changes made to paywall settings will only affect app versions that contain the dynamic paywall. This means iOS v3.55 and Android v3.56. Older versions of your app will show the paywall content that was configured when that version was built and released to your members. Upgrade your apps for the latest experience and control.